
If you’re anything like me and buy vintage jeans in bulk, you’ve likely found yourself with a NSFW hole on one too many occasions. (I’m referring to the dreaded under-the-butt rip, though knee rips can sometimes become an issue, too.) They look rugged and cool for the first few wears but eventually, as the rips expand, it becomes clear that, without a repair, your pair of jeans will be no more. But, after watching one too many DIY videos on TikTok, I’m convinced that I — and you, too — can handle the job of patching up the jean holes all by myself.
Thanks to designer labels like Marni, Ssōne, Ciao Lucia, Bode, and more, the patchwork trend is rising through fashion’s ranks, providing yet another reason for us to take matters into our own hands and make art out of our torn and ripped garments using patches.
With that in mind, I asked Refinery29 designer Lily Fulop, a TikTok mending expert and the author of Wear, Repair, Repurpose: A Maker’s Guide to Mending and Upcycling Clothes, to walk us through a simple patch repair from start to finish. She used a pair of vintage 501 Levi’s of mine that had seen better days after four years of non-stop wear. Spoiler: After she was done with them, they came out looking better (and cooler) than the day I got them.
Ahead, follow along as she shares her steps to patchworking a pair of ripped jeans.
At Refinery29, we’re here to help you navigate this overwhelming world of stuff. All of our market picks are independently selected and curated by the editorial team. If you buy something we link to on our site, Refinery29 may earn commission.
Step 1: Buy Supplies
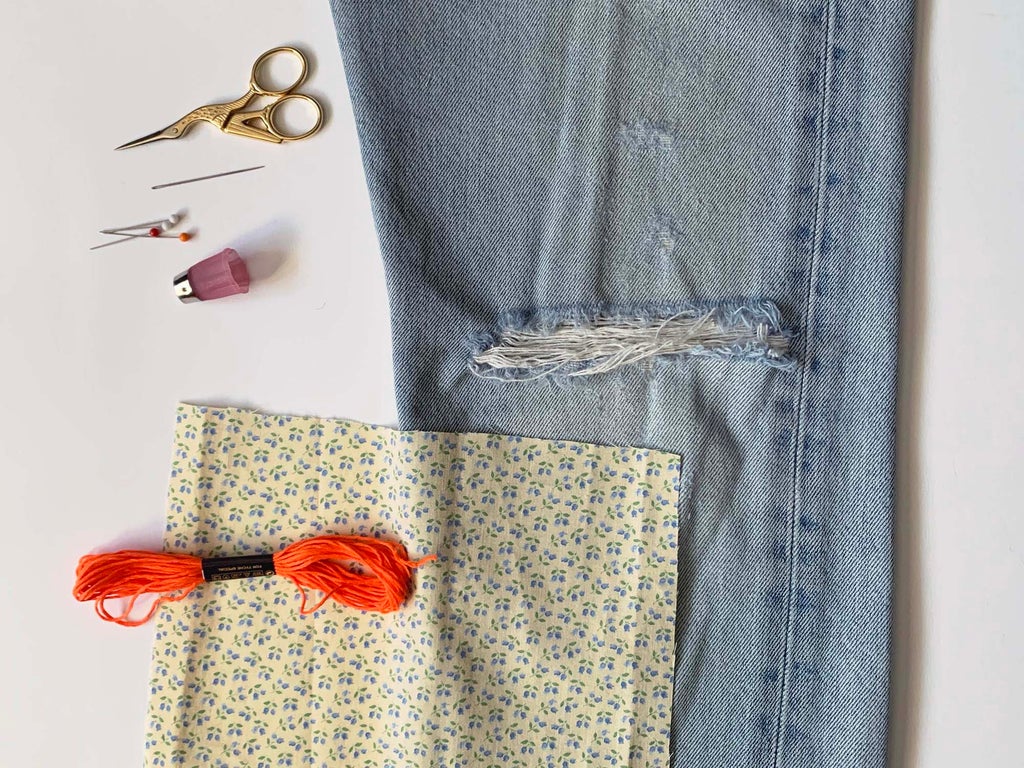
Before you start, you need to purchase some supplies. Your shopping list will include a piece of fabric for each “patch” you plan to add, embroidery floss, an embroidery needle, pins, a thimble, scissors (preferably a pair of sharp sewing scissors), and an iron. Oh, and the garment you’re planning to work with. Fulop used jeans, but a jacket, handbag, or T-shirt would work, too, with these steps.
Step 2: Prepare the patch
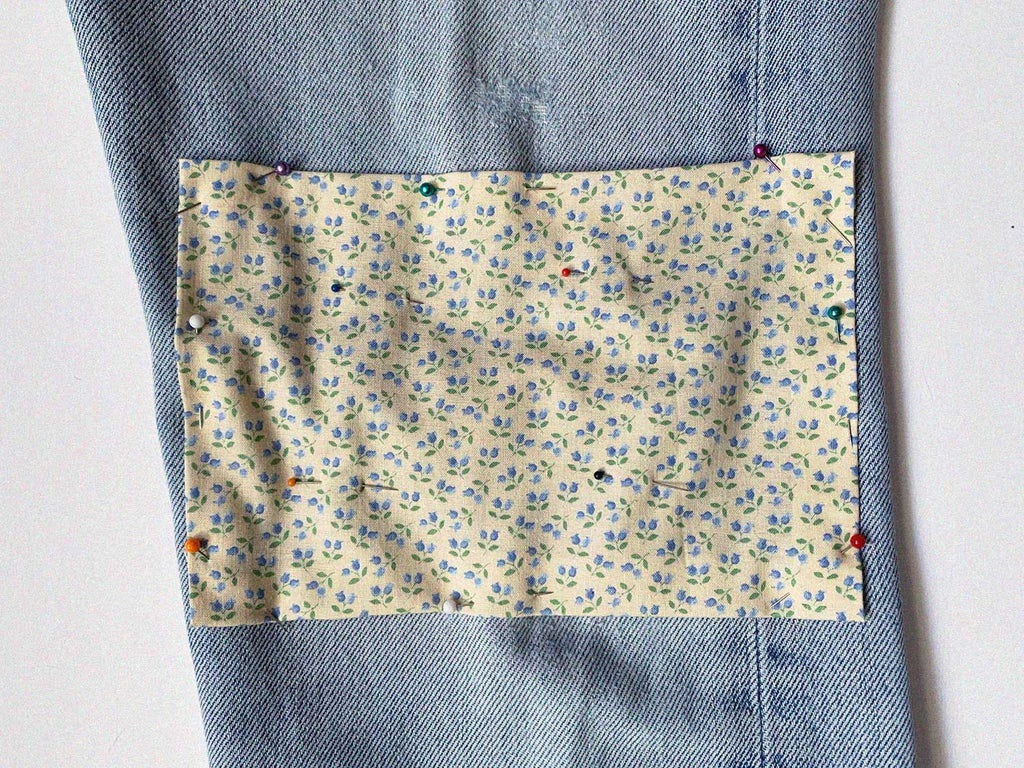
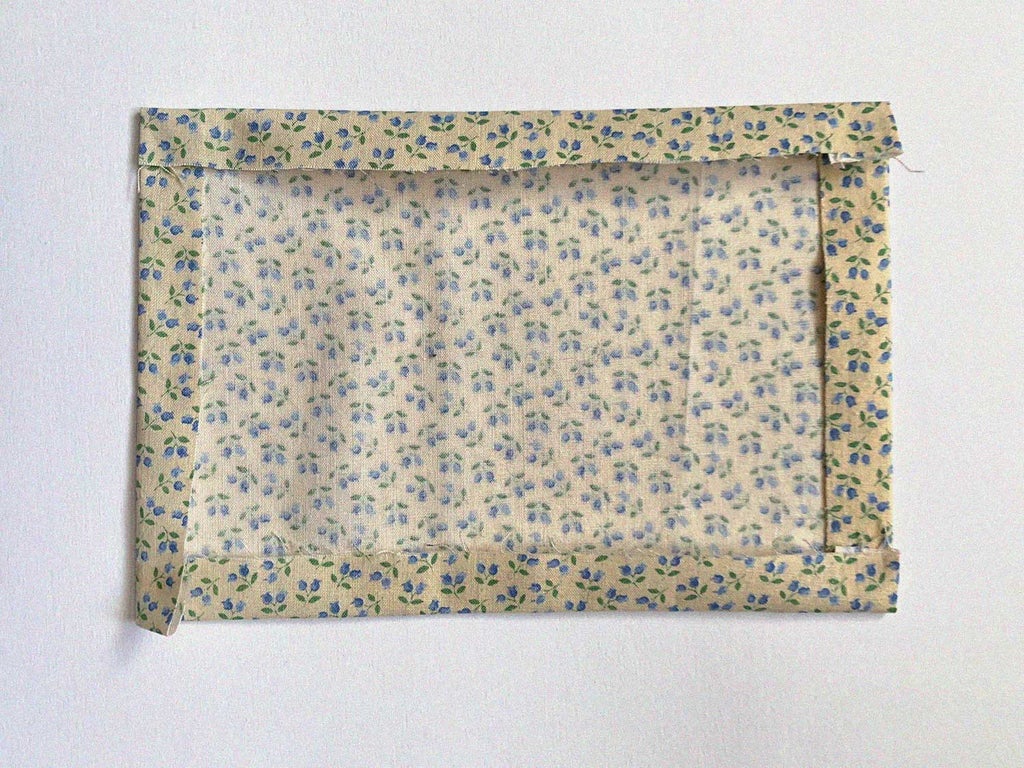
Once you’ve gathered all the necessary materials, prepare the patch. “Cut a rectangle of fabric that is bigger than the hole you’re trying to cover,” Fulop advises. “It should extend at least a couple inches beyond the hole in all directions.” From there, she says to fold about ¾ of an inch of each edge of the fabric to the underside, and then iron the edges into place. Once the edges are flat, use your pins to secure the patch to the jeans (or whatever item you chose to use). “Be sure to only go through one layer of your jeans,” she says. “You don’t want to pin the leg together.”
Step 3: Prepare the needle & thread
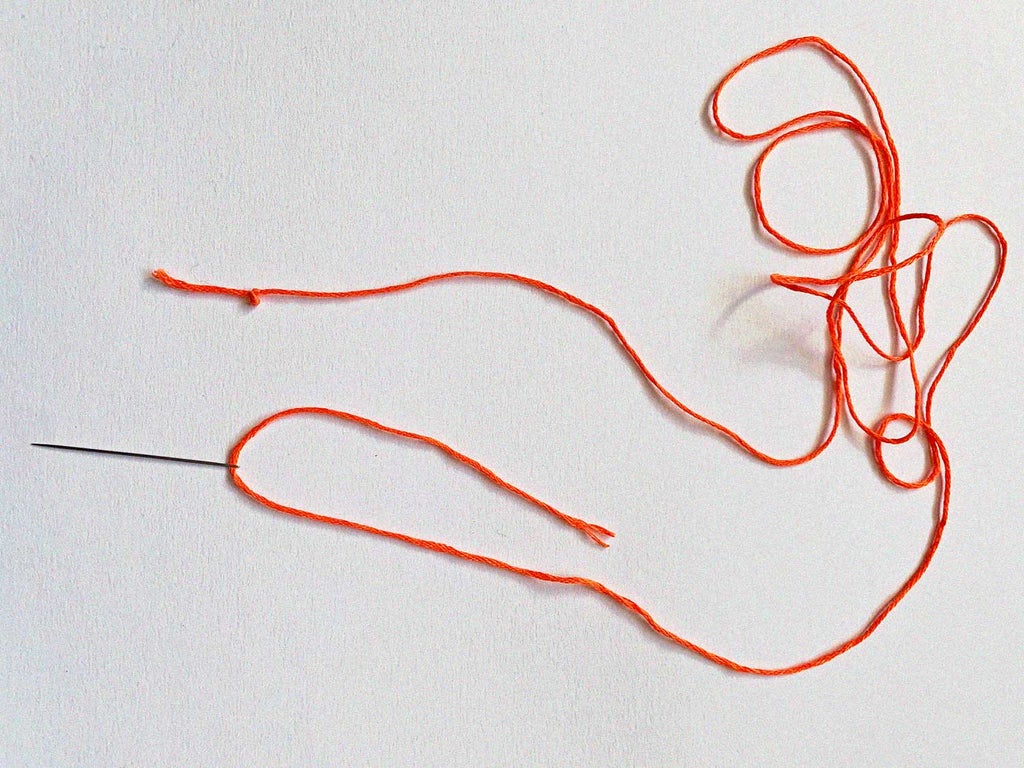
Cut a piece of embroidery floss so that it’s about as long as your arm. Then, thread your embroidery floss through the eye of the needle. Once it’s secure, tie a knot at the end of the floss.
Step 4: Attach the body of the patch to the jeans
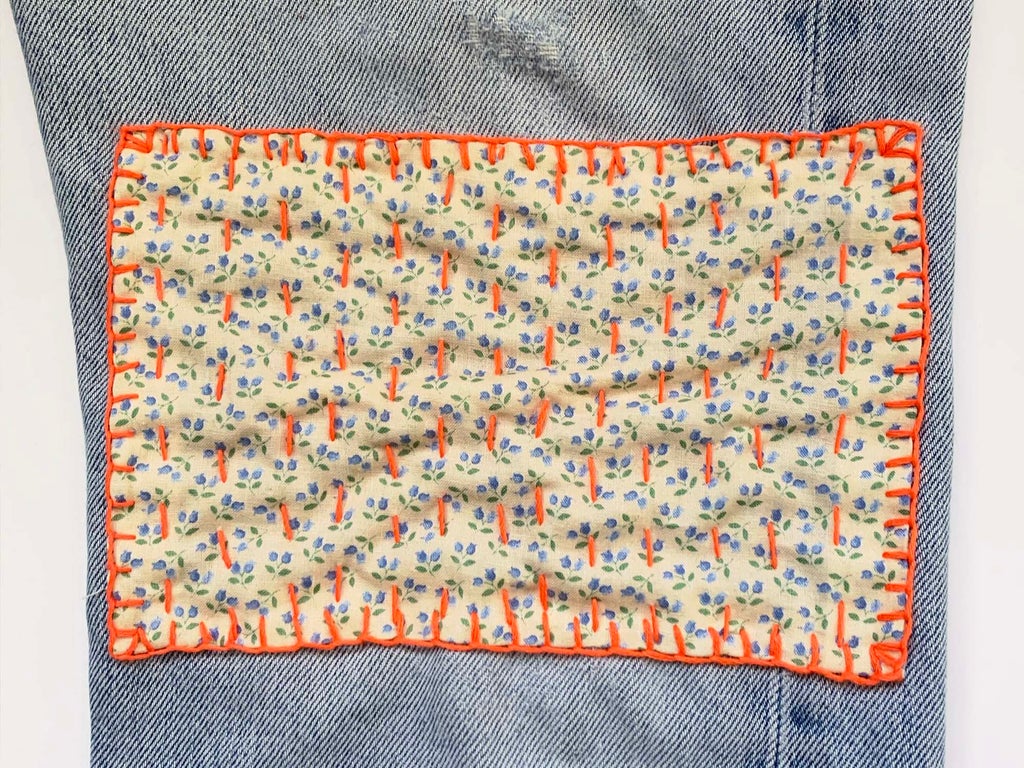
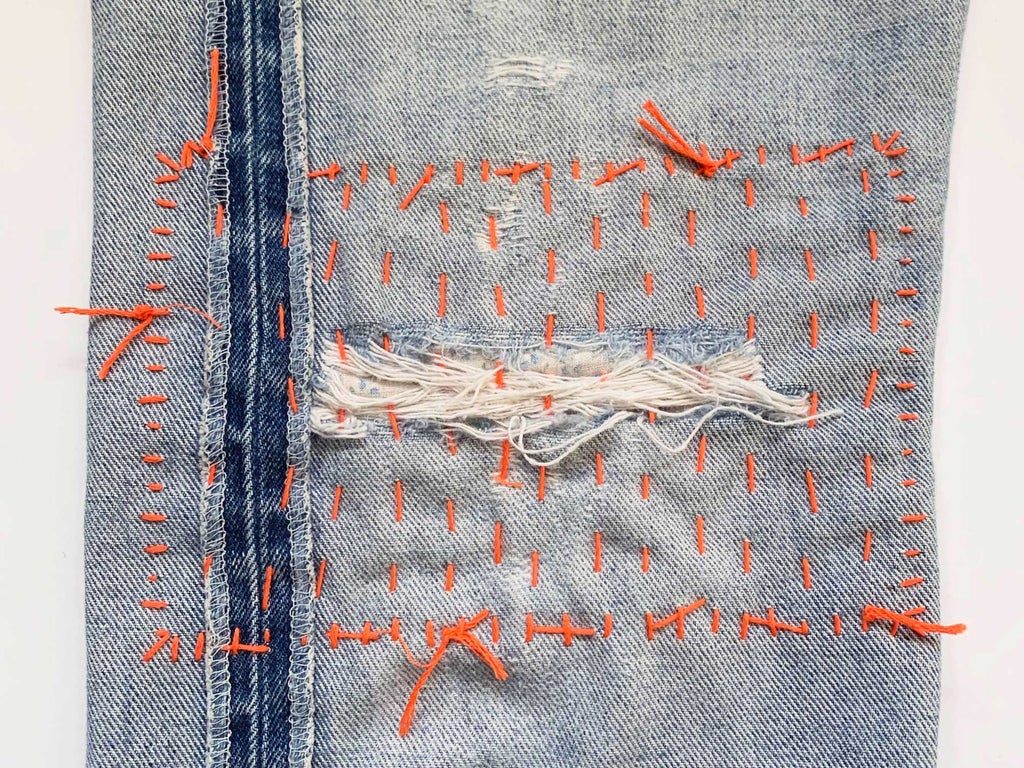
Starting from the inside of your pants and the bottom corner of your patch, bring your needle up through the patch and the front layer of denim. Next, bring the needle back down about a centimeter away from where it entered in order to create your first stitch. Continue by bringing the needle up again, about a centimeter away, and back down in a straight line. “This is called the running stitch,” Fulop explains. If you would like to see this in action, she has a video tutorial of this particular stitch on her TikTok channel Mindful Mending.
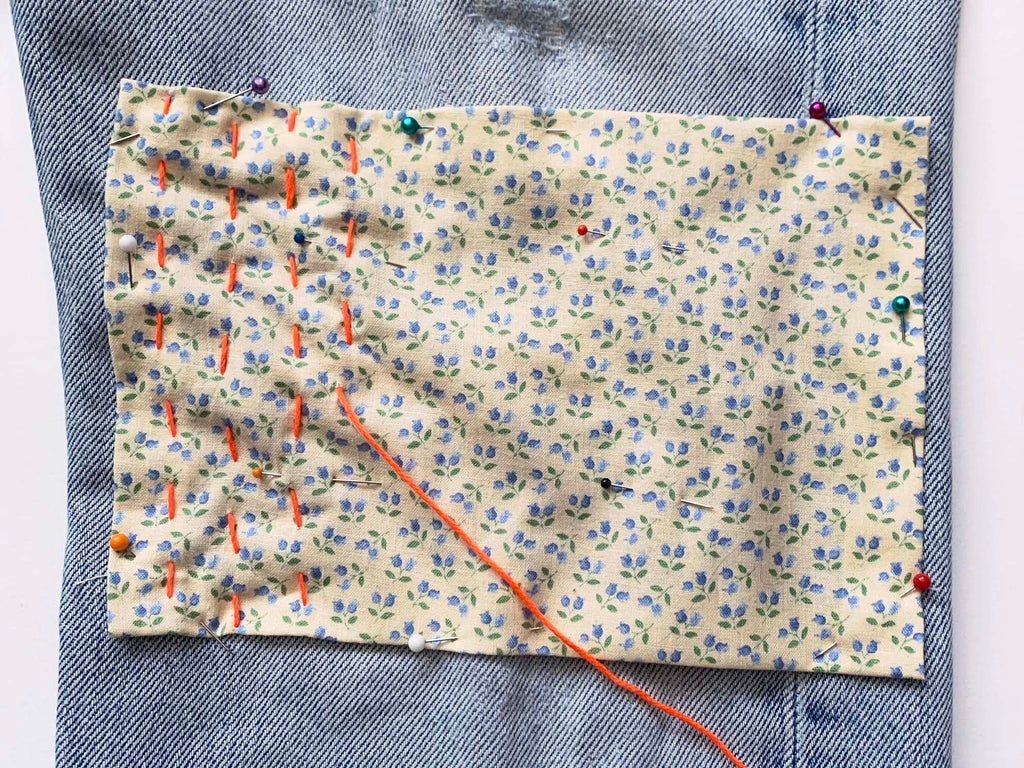
Keep going with this step until you reach the top of the patch. According to Fulop, the final stitch in the column should end inside the pants. “You’ll then move your needle over to start the next column,” she says. “A horizontal stitch connecting the [two] columns will be visible on the inside, but not the outside.” From there, repeat the process for the next column. Keep going until the entire patch is covered with stitches. (Fulop stitched 13 columns on this.)
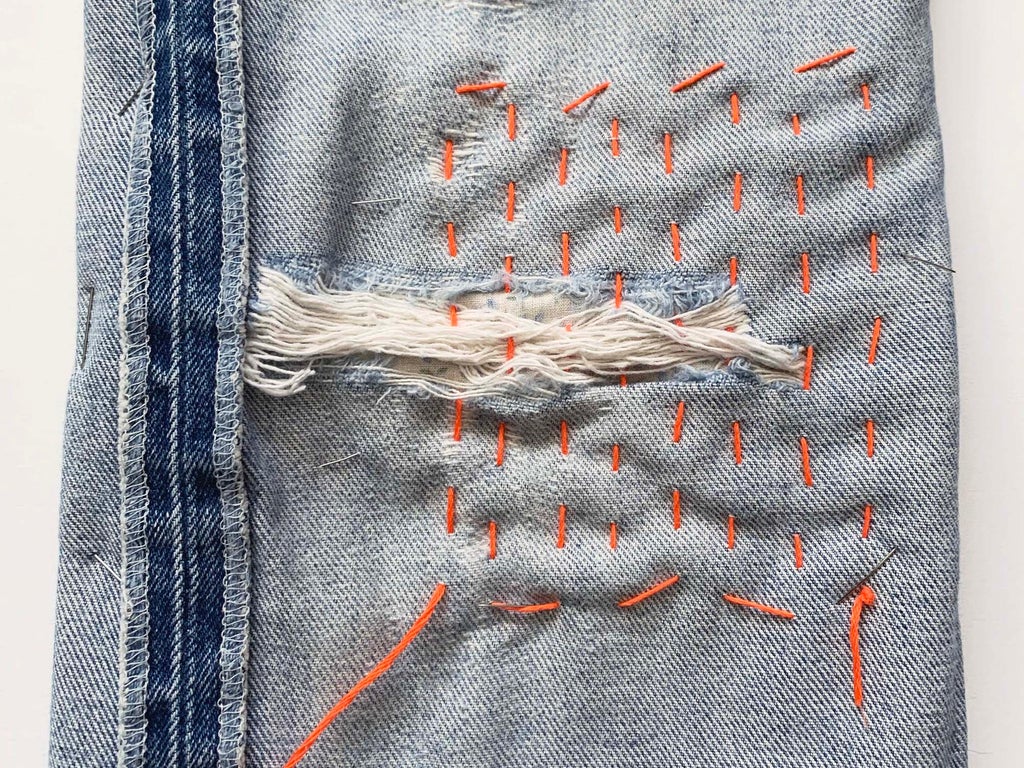
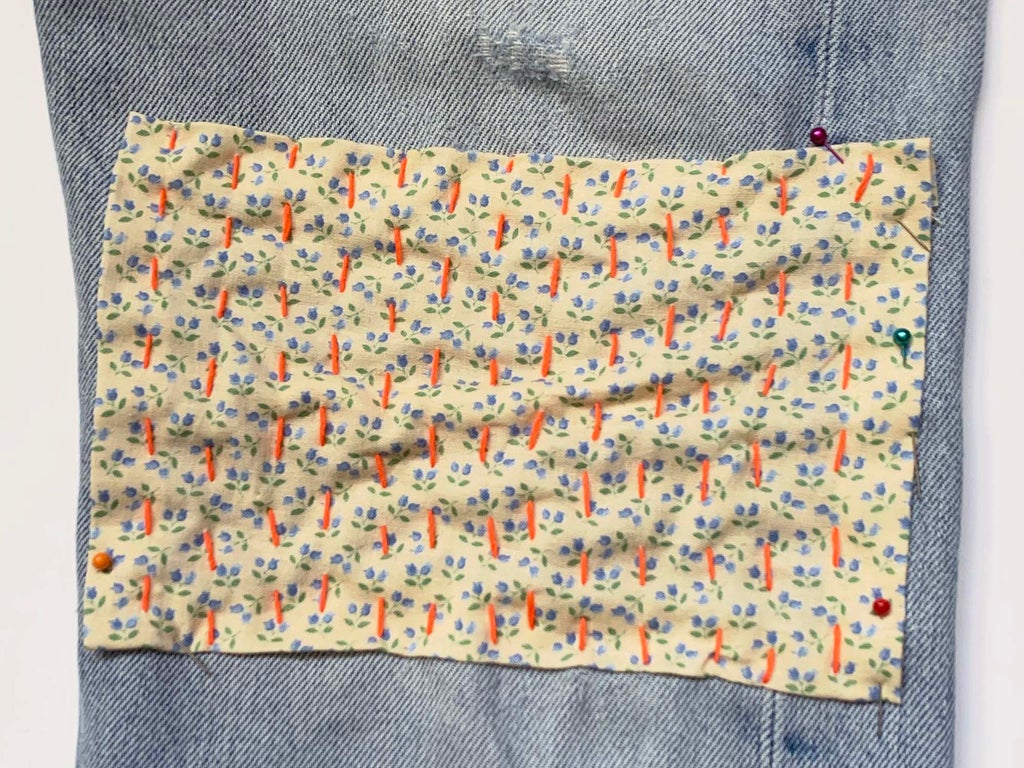
“If you run out of thread, tie another piece onto the remaining tail on the inside of your jeans, so no one will see,” says Fulop. Once you’re finished, bring your needle to the inside of your pants and tie a knot. Trim your extra floss about an inch away from the knot.
Step 5: Secure the edges of the patch
Next, prepare your needle and thread for a new stitch (refer back to step 3!). For this step, you have two options: You can use a new piece of floss (maybe a new color!), or recycle whatever floss was leftover from your last stitch to reduce waste. Starting at the top of the patch, pull your needle up through the inside of the jeans to the outside of the patch, about a centimeter from the edge. Then, pull it back down at the edge, going through just the denim and avoiding the patch. “Come back up in the hole you started in, and then catch your thread in the loop you created so that, when you draw your thread to the left, you don’t make any diagonal stitches,” Fulop says, noting that this is the most complicated stitch of the entire process. “The following stitches are a lot simpler!”
If you need any further demonstration, there are plenty of great YouTube tutorials out there.
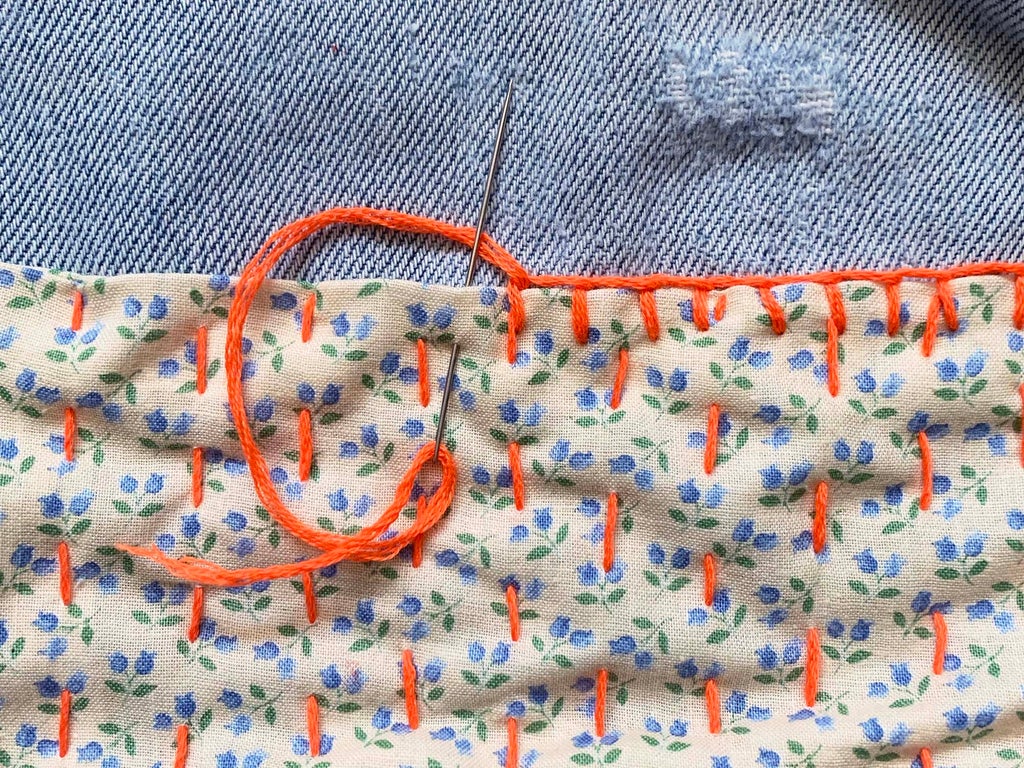
Moving from right to left, push your needle down through the patch and up at the edge (again, only through the denim), catching the loop of the thread each time. “Each stitch makes an upside-down L shape,” says Fulop. From there, continue going around all the edges until you end up back where you started. This process is called a blanket stitch. Another stitch that you can use to secure edges is a whip stitch, which Grey’s Anatomy fans (me!) might remember as one of Dr. Yang’s specialties.
Step 6: Check the work
Look over the finished product. The above photos show what the inside and the outside of your jeans should look like once you’re all finished. “Repeat on any other holes you have for a cute, patchy look that’ll make your jeans last longer,” says Fulop.
Like what you see? How about some more R29 goodness, right here?
How To Get The Perfect Tie-Dye Every Time

No comments:
Post a Comment